Saturday, January 10, 2015

Tutorial HowTo Root Samsung Galaxy Y GT-S5360

Root your Galaxy Y

Rooting is the first step to customise your device. Without rooting absolutely 'extraordinary' nothing is possible. Yes your warranty becomes void after that. So what?? You can always get it back after unrooting it. So chill. No matter where you read that its very risky or something like that, I'll say refrain from going to those sites. They are just putting unnecessary fear into your mind. Most probably they fear you could make your device function better than them. So lets go on with it. I've made it simple for you. Just follow the steps.

1. Charge your device more than 80%. Coz you still have a lot of work to do...

2. Backup your contacts, messages, apps and everything you want. For the contacts and messages you can just about use anything off the Play Store with a few stars and good reviews. But for the apps I would personally recommend the Astro app. Yes I know what you want to ask. It's free..

3. Download the zip file for root and place it directly on your SD card, not in any folder. Do not extract it.

4. Switch off your phone.

5. Press the Home button, Power button and the Volume Up button and keep holding it until the Samsung logo appears. Now let go of the buttons. You will see that some writings have come in red colour. This is called the Recovery Mode. Your touch screen wont work now. So don't panic if you touch the screen and nothing happens. Only the volume buttons, home button and the power buttons work now. Volume buttons for going up and down. Home button for selecting and Power key for going back to previous screen.

6. Select 'Apply update from sd card'.

7. Choose the file that you have downloaded and select yes.

8. After that you'll be taken to another screen where there will be an option 'Reboot system now'. Select it and be patient and wait for your phone to switch on.

9. Check your apps and if you see the Superuser app, it means you are rooted.

10. Now open it and update the binaries.

That's it. You are good to go. The proud owner of a rooted SGY.
Attached Files
File Type: zip update.zip - [Click for QR Code] (2.16 MB, 399420 views)

Wednesday, January 7, 2015

HOW TO Root Samsung Galaxy Grand Duos GT-I9082 (Safe and no loss of data)

Hi, today i am going to explain how to root your phone in safest way with no loss of data.

* Download the files from the attachments and extract them (for CWM visit : http://forum.xda-developers.com/show....php?t=2160671 )
* Switch off your phone and boot into download mode (vol down + home + power) and press vol up to proceed
* Open odin in pc and and click on PDA
* Locate the you extracted from the CWM touch zip and click open
* Make sure only 'Auto reboot' and 'F.Reset Time' is checked
* Click start once complete odin should say 'PASS' and your phone will reboot
* Copy the Supersu zip file into your external sd card.
* Now switch off your phone and boot into recovery mode (vol up + home + power)
* Now select install zip from sd card -> Choose zip from sd card
* Now locate the supersu zip file and click install
* Now CWM will install the zip
* Samsung devices come with a special flash counter that tracks the no. of times you flash custom roms and zips.
* If you wish to reset the flash counter back to original Download triangle away app by chainfire and hit reset counter. (in attachments)

File Type: zip Odin307.zip - [Click for QR Code] (453.2 KB, 32516 views)
File Type: zip UPDATE-SuperSU-v1.25.zip - [Click for QR Code] (1.00 MB, 69013 views)
File Type: apk Triangle Away.apk - [Click for QR Code] (267.1 KB, 22934 views)

Monday, January 5, 2015

How To Root Samsung Galaxy S Duos S7562

Samsung is the most trending manufacturer in the mobile world. They manufacture many phones in the affordable prices. This tutorial is to explain how to root Samsung Galaxy S Duos S7562.
Before proceed with the tutorial, if you are a newbie must check this tutorial.
Samsung-Galaxy-S-Duos

Prerequisites:

1.First make sure your mobile have the battery percentage level of minimum 70 to 80%.
2.Next enable the USB debugging mode by following the path Settings > Applications > Development > USB Debugging – Check box).
3.Next make sure you have backed up all the important data’s using appropriate backup applications.
Disclaimer : Follow the given below procedure at your own risk. I would not be held responsible for any damage.

Procedure:

1.First, download and install the Samsung KIES on your computer. In case if it is already installed, just ignore this step.
2.Next, download and extract the root files on your computer. After extracting you will be able to see the given below files.
Galaxy-S-Duos-Root-Files1
3.After that connect your phone to the computer using USB cable and copy the SuperSU-v1.80.zip file to your SD card.
4.Then Power OFF your Samsung Galaxy S Duos S7562 smartphone and allow it to enter into the download mode.
Power-Off-Samsung-Galaxy
5.To enter into the download mode press and hold the Volume Down button, Home Button and Power Button at the same time for 4-7 seconds.
Galaxy-S-Duos-Download-Mode
6.While you are in download mode you will see a yellow triangle like in the given below picture. Continue the process press the Volume Up Key.
Samsung-Galaxy-Warning-Sign
7.Now, open the Odin3 (which you have already extracted in the Step#2) on your computer. Then connect your phone to the computer.
Galaxy-S-Duos-Odin
8.Once you have connected, Odin will automatically detect your phone and show the “added message”.
Galaxy-S-Duos-added-to-Odin-600x428
9.After that click the “PDA” button and select the recovery.tar file that you have extracted in the second step.
Select-recovery-file-for-Galaxy-S-Duos
10.Now, click the “Start” button in Odin to start the flashing process.
Start-Flashing-Galaxy-S-Duos-in-Odin-600x428
11.After that you will see a Green Pass Message in Odin. Now, you can disconnect your phone from the computer. During this process your device will restart automatically.
Galaxy-S-Duos-Flash-Completed-600x428
12.After that again Power OFF your phone and enter into the recovery mode. For that you need to press and hold the Volume Up button, Volume Down button, Home button and Power button for few seconds until you boot into the recovery mode.
13.In the Recovery menu, select the “Install zip from SD card > Choose zip from SD card > Install SuperSu v1.80.zip”.
14.Once flashing is finished, select Go Back > Reboot System Now option from the recovery menu.
SuperSU-Installed-on-Samsung-Galaxy
That’s it! Now, your phone was rooted. To know whether the rooting process was successfully finished, open the app menu in your phone. There, if you see SuperSU app you can conclude that your phone was successfully rooted.

Saturday, January 3, 2015

HOW TO Root Samsung GALAXY S3 (I9300)

How to root GALAXY S3? I believe this is the question that Samsung users are keen on discussing. Thus finding a perfect tool for this job becomes the priority. Kingo Android Root is just what you need to root your Samsung GALAXY S3.

Preparations:

  • Free download Kingo Android Root and install it on your computer.
  • Make sure your device is powered ON.
  • At least 50% battery level
  • USB Cable (the original one recommended)
  • Enable USB Debugging on your device.

Step 1: Find the desktop icon of Android ROOT and double-click to launch it.

Kingo Android ROOT

Step 2: Connect your GALAXY S3 to your computer via USB cable.

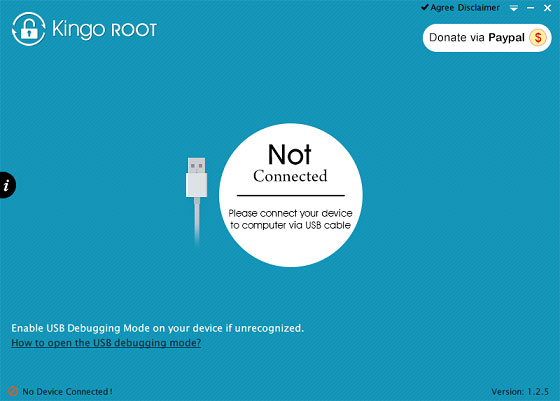
If it is the first time to connect, you may have to install device driver software. It should be done automatically. After successfully installing device driver software and enabling USB Debugging mode, your device should be well connected. And the interface will be shown as below.
Kingo Android ROOT
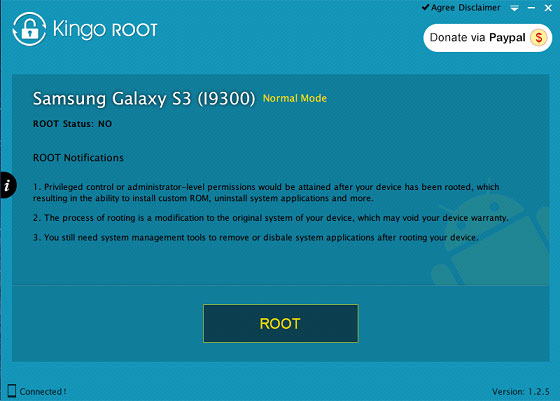
NOTE: Reading the notifications carefully before jumping into the ROOT process. And if you are still not sure, click here for further information.

Step 3: Click ROOT to start the process when you are ready.

Kingo Android ROOT
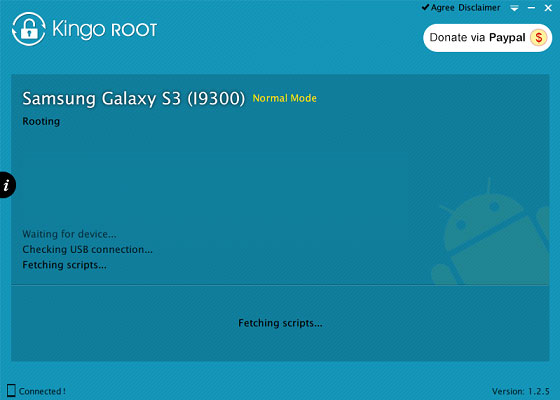
NOTE: It will normally take 3 to 5 minutes to complete. Once you started, do not move, touch, unplug USB cable, or perform any operation on your device anyhow!

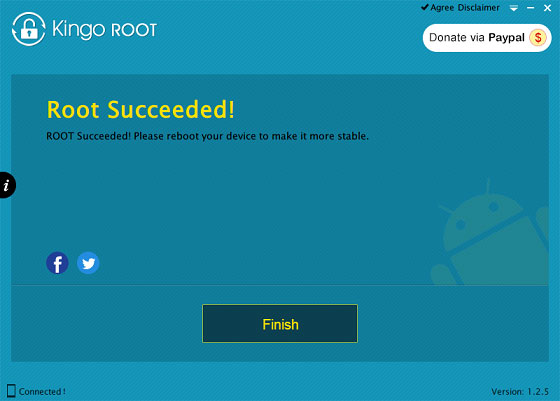
Step 4: ROOT Succeeded! Click Finish to reboot your device.

Your device is now successfully rooted. And you need to click Finish to reboot it in order to make it more stable. Still, do not touch, move or unplug it until it reboots. Check your device and find out SuperSU icon, which is the mark of a successful ROOT.
Kingo Android ROOT
One thing about Kingo ROOT that worth your attention is that there is the REMOVE ROOT function built in, which means you may use it to remove ROOT from your GALAXY S3 with just one-click as well, clean and simple. Click to see how to remove root from GALAXY S3.

Monday, December 1, 2014

How to Root Micromax Canvas 4 A210

The much hyped phone from the Canvas series has been launched by Micromax recently. Although after looking at the specifications most of the consumers are really disappointed. For those who are happy owners of Micromax Canvas 4 A210, here is the process to root access the Micromax Canvas 4 to make most out of the hardware of the phone.
How to Root Micromax Canvas 4 A210
Here we are going to provide you with quick way to root your Micromax Canvas 4 A210 with easy to follow steps.
Requirements:
  • Micromax Canvas 4 A210 generic handset.
  • USB cable for connecting device to PC.
Pre-Requisites:
  • Fully back-up your Micromax Canvas 4 A210.
  • Disable all security apps and programs (Antivirus and Firewall) from your device.
  • Make sure that all the drivers are installed properly.
  • Make sure your phone is fully charged.
  • Enable USB debugging on your Micromax Canvas 4 A210.
    Go to Settings > Development > USB debugging.

How to Root Micromax Canvas 4 A210

  • Download Rooting Tool and extract it on your computer.
  • Connect your Micromax Canvas 4 A210 to your computer via USB cable.
  • Run the “RunMe.bat” file from the extracted folder downloaded in first step. This should open the command prompt.
  • Press any key, the process will begin and your device may reboot several times, wait until than.
  • Once completed you will find “SuperSu” in the application list.
  • Reboot your Micromax Canvas 4 A210 manually.
  • Your phone is now rooted.

How to Unroot Micromax Canvas 4 A210

Open SuperSU > Settings > Full Unroot
Your Micromax Canvas 4 A210 will reboot and Unroot.
Disclaimer: Please carefully understand what you are proceeding with and where it will lead you to. Rooting voids your warranty (however you can unroot your device any time) and can potentially brick your device if you fail to follow the instructions carefully. Follow this guide at your own risk.

Friday, August 15, 2014

ROMS for Micromax Canvas 2 Colours A120

ROMS-

STOCK KITKAT-
This is official stock 4.4.2 flashable with sptools, just extract the rar, open sptools, click scatter-loading and select the KK scatter file in the folder you just extracted, press firmware upgrade, take out battery and connect phone, you must have all the necessary drivers before that, DOWNLOAD


STOCK KITKAT FOTA CWM-
Many of you might be having problem downloading fota on jb, i made it easier by making a cwm flashable zip of fota update, ROM THREAD


CleanKAT ROM by me-
It's the first and the best stock based kitkat ROM by me, I reccomend using this, follow the ROM THREAD for all links and downloads, flashing instructions and updates

DarkL ROM by me-
It's a themed rom by me, actually a cool hybrid look of android L and dark theme, visit ROM THREAD for downloads and screenshots etc. This ROM is based on stock kitkat so, it's bugfree too


VIBE UI V1.5 Kitkat ported by me-
This is latest vibe ui, it looks great, google "vibe ui 1.5" for screenshots, visit the rom thread for download link and more, ROM THREAD


KAT120 ROM by me-
It's the first RIO based kitkat custom ROM for C2C by me, follow the ROM THREAD for flashing instructions and downloads/updates


EPIC120 ROM by me-
I reccomend using this ROM for JB users, even after trying other ROMs, I always come back to EPIC, it will give you 500+ free ram and 650+ free ram on boot also, heating is reduced, read everything about it before deciding, Head to my ROM THREAD here for all info about this ROM


XOLO Q1010i ported by me-
This is XOLO Q1010i stock 4.2.2 ROM ported by me, check ROM THREAD for all info about how to flash and screenshots and do hit thanks if you like it


Wiko Rainbow CWM flashable-
This is the latest version of wiko rainbow stock ROM (23 jun) flashable via CWM recovery for our canvas 2 colours, this is also made by me, go to the ROM THREAD here for flashing instructions


Myphone Rio ROM-
Micromax A120 is a rebranded myphone RIO and Myphone RIO ROM is much better than stock JB ROM
Instructions-
1.You must have CWM recovery installed before trying this
2.Make a full backup from CWM in case anything goes wrong
3.Download RIO ROM MyPhone_Agua_Rio_S5501_v1.17_Deodexed
4.Reboot into recovery
5.Wipe data/factory reset
6.Go to advanced and wipe dalvik cache
7.Go to mouns and storage and format /system
8.Go back and select install zip from sdcard, select MyPhone_Agua_Rio_S5501_v1.17_Deodexed.zip and confirm
9.Reboot after flashing is complete
10.Enjoy AOSP like experience


Stock JB 4.2.2 SP flashable-
This is official stock 4.2.2 flashable with sptools, if you want to flash my cleankat rom, this is the correct base, just extract the rar, open sptools, click scatter-loading and select the KK scatter file in the folder you just extracted, press firmware upgrade, take out battery and connect phone, you must have all the necessary drivers before that, DOWNLOAD


STOCK A120 ROM 4.2.2-
Instructions-
1.You must have CWM recovery installed before trying this
2.Make a full backup from CWM in case anything goes wrong
3.Download STOCK ROM
4.Reboot into recovery
5.Wipe data/factory reset
6.Go to advanced and wipe dalvik cache
7.Go to mouns and storage and format /system
8.Go back and select install zip from sdcard, select "copy of stock rom.zip" and confirm
9.Reboot after flashing is complete
10.CREDITS- Akash Ujjainkar for sharing
11.Enjoy

Saturday, July 12, 2014

Recovery for Micromax Canvas 2 Colours A120

RECOVERY-

CWM Recovery for JB-
1.You must be rooted before this, see above how to root 4.2.2
2.Download recovery.img from here and place it in your sd card, not in any folder !!
3.Install mobileuncle tools from play store
4.Open mobile uncle tools and select recovery update, now select RECOVERY UPDATE
5.Select Recovery.img which you placed in /sdcard
6.You can now switch off the phone then press (vol up+vol dwn+power)


STOCK Recovery for JB-
Download here, thanks to amit_aks_007 for sharing
Flashing instructions are same as CWM(above)


CTR Recovery for KK-
1.Download and replace default recovery.img is sp flashable files with this one
2.Open sptools and select your kitkat scatter file
3.Now untick everything except recovery and click download
4.Done, press vol dwn + vol up + pwr when switched off

Buy Best Smartphones at Low Price in India.

1.  MICROMAX CANVAS NITRO A311 Specifications : Dual SIM, 3G Android v4.4.2 (KitKat) (can be update to Android Lollipop...